Waveform Generator — wfmgen
doppler ships a C-first waveform generator: one declarative synth engine (every algorithm in C, exactly once), exposed two ways that produce byte-identical output —
wfmgen— the command-line tool. A one-segment run is the simple single-waveform case.doppler.wfm— the same engine as a Python API, one import path.
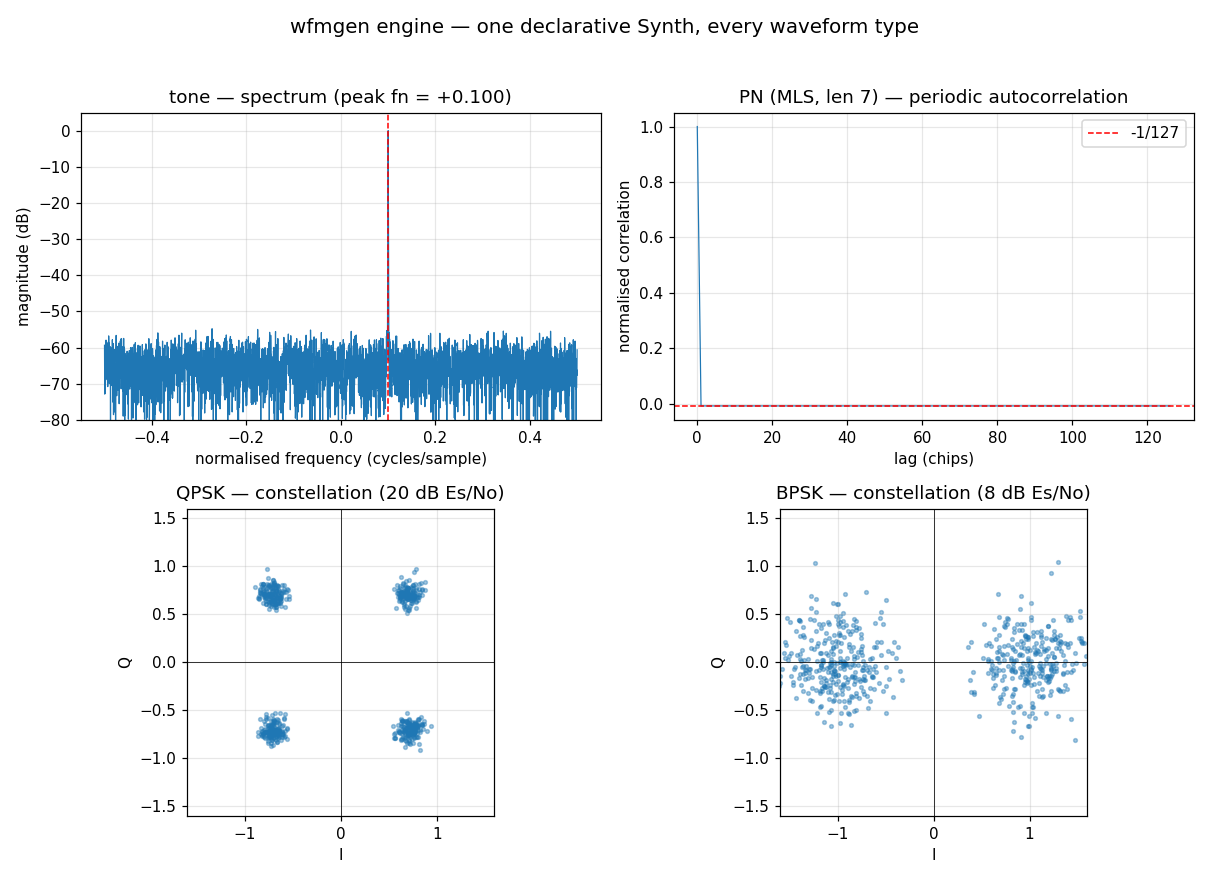
The 30-second version
This guide is four pages:
| Page | The question it answers |
|---|---|
| This one | What is the model, how do I run it, and what does a command look like? |
| Waveforms | What can I generate, and with what knobs? Types, levels, framing, coding, Doppler. |
| Scenes | How do I put waveforms in time, sweep them, and stream them? |
| Python API | How do I do all of that from Python instead? |
Getting samples into a file and back out again is
Capture I/O — a section of its own, because reading a
capture has nothing to do with generating one, and most captures worth reading
were not generated here. Writing captures holds the
--sample-type / --file-type / --endian / --output reference.
Source and segment — the one distinction to get right
A source is WHAT plays. A segment is WHEN.
Everything else follows from that. Sources stack upwards — several playing at once, into one receiver, over one span, sharing one noise floor. Segments lay out rightwards — one span after another in time.
Read the diagram below left to right as the sample clock. It is one scene of 7168 samples, and every object in the model appears in it exactly where it does its work.
flowchart LR
    subgraph SEG1["<b>Segment</b> · samples 0—4095"]
        direction TB
        q["<b>Synth</b> · qpsk<br/>the signal"]
        t["<b>Synth</b> · tone<br/>an interferer"]
        n["<b>Synth</b> · noise<br/>the floor"]
    end
    GAP["its trailing gap<br/>4096—5119<br/><i>keeps the noise floor</i>"]
    subgraph SEG2["<b>Segment</b> · samples 5120—7167"]
        direction TB
        c["<b>Synth</b> · chirp"]
    end
    SEG1 -->|"off_samples"| GAP
    GAP -->|"<b>.add()</b> — next in time"| SEG2
    SEG2 --> COMP["<b>Composer</b><br/>press play"]
    COMP --> IQ[("7168 samples<br/>complex64 I/Q")]
    COMP -. "prepare()" .-> PLAN["<b>Plan</b><br/>render once, then<br/>re-weight per sweep point"]

    classDef synth stroke-width:3px;
    class q,t,n,c synth;
Everything the model has is in that one picture:
- Stacked inside a box = summed, at the same instant, sharing one
noise floor — that is
.sum(), and each stacked box is aSynth. - A box is a
Segment: a span of samples, plus the trailing gap that follows it. - Box after box, left to right = sequenced in time — that is
.add(), and the whole row is theTimeline. - The
Composerat the right-hand end turns the row into samples; the dashed branch isPlan, a cache for when you need the same scene many times over.
Summing and sequencing are the only two ways to combine anything here.
The same thing has four names
A source is one waveform's recipe, and which word you meet depends only on which API you are reading. This is the single most common stumble, because the guide's own pages speak different dialects: the CLI and JSON pages say source, the Python page says Synth.
| Where you are | What a source is called | What a segment is called |
|---|---|---|
| C API | wfm_source_t |
wfm_segment_t |
| Scene JSON | an entry in "sum" |
an entry in "segments" |
| CLI | the flags themselves — one run describes exactly one source | --count / --off on that run |
| Python | Synth |
Segment |
The CLI row is why a one-segment run needs no vocabulary at all: with one
source in one segment there is nothing to name, which is exactly the simple
case wfmgen --type qpsk --count 100000 is.
The ladder — the whole mental model
wfmgen has one job, turning a description of a signal into I/Q samples, but a
realistic description has layers: what a waveform is, how loud and how
long it plays, what else plays alongside it, and what comes next. Each
layer is an object, and they stack in a fixed ladder:
Synth → Segment → Timeline → Composer → samples.
That is the timeline above, read as a list of objects rather than as a span of time — the same four boxes, and each layer adds exactly one thing the layer below it has no opinion about:
| Object | Is | Adds | Analogy |
|---|---|---|---|
Synth |
one source's recipe — what a single waveform is (type + params, optional symbols/bits) |
the signal itself | a single instrument's part |
Segment |
one or more Synths summed, over a time span (num_samples) + trailing gap (off_samples) |
timing + mixing + one noise floor | a bar of music — several instruments playing together for a while |
Timeline |
Segments in sequence (.add) |
order in time | the arrangement — bars back-to-back |
Composer |
renders a scene (a Segment or Timeline) to samples | repeat / continuous / seed advance / output | the performance — pressing play |
The two verbs are orthogonal: .sum() mixes sources over the same span
(one receiver, one sample rate, one shared noise floor); .add() sequences
segments in time, back-to-back. .sum stacks in one column, .add lays them
out along a row. Worked examples are in Scenes.
Why Synth exists when Segment does
Because a Synth is reusable and standalone — a pure recipe with no notion
of when or how long. You can pull samples from it directly with .steps(n)
(no Segment, no Composer — the notebook case), drop the same Synth into
several Segments at different levels, or mix several inside one Segment.
- Just need samples of one waveform? Build a
Synth, call.steps(n). - Need mixing, timing, sequencing, or a file type? Wrap Synths in
Segment→Timeline→Composer.
Gotcha — where timing lives
Timing (num_samples, off_samples) belongs to a Segment, not a
Composer:
from doppler.wfm import Synth, Segment, Composer

seg = Segment.sum(Synth(type="qpsk", sps=8), fs=1e6, num_samples=4096)
iq = Composer(seg).execute(4096)
Passing num_samples/off_samples to Composer(...) directly raises a
TypeError naming the offending keys — so the same message also catches a
misspelling rather than a conflict. (As a convenience,
Composer(type="qpsk", num_samples=…) builds a one-segment scene for you, but
you cannot pass both a prebuilt segment and segment kwargs.)
The CLI is the same ladder with a flatter surface: a bare wfmgen --type … is
a one-source, one-Segment render; --from-file spec.json describes a Timeline
of Segments; the tool is the Composer.
Recipes
Copy-paste starting points. Each one below runs as written — they are executed by the documentation gate, not just spell-checked.
# A clean tone at +100 kHz (1 MHz Fs), 1 Msample, 16-bit I/Q to a file
wfmgen --type tone --freq 1e5 --fs 1e6 --count 1000000 --sample-type ci16 -o tone.ci16

# Noisy BPSK at 6 dB Eb/No, as CSV for quick inspection
wfmgen --type bpsk --snr 6 --snr-mode ebno --count 2000 --file-type csv -o bpsk.csv

# A band-limited WCDMA-style QPSK downlink (RRC roll-off 0.22)
wfmgen --type qpsk --sps 8 --pulse rrc --rrc-beta 0.22 --count 100000 -o wcdma.cf32

# A length-9 MLS, primitive polynomial chosen automatically
wfmgen --type pn --pn-length 9 --sps 1 --file-type csv -o pn.csv

# Your own constellation (16-QAM here) from a raw cf32 file. The file is
# interleaved float32 I/Q -- make one however you like; this is the shortest way.
python3 -c "import numpy as np; g=np.array([-3,-1,1,3]); \
c=(g[:,None]+1j*g[None,:]).ravel()/np.sqrt(10); \
np.tile(c,64).astype(np.complex64).tofile('qam16.cf32')"
wfmgen --type symbols --symbols-file qam16.cf32 --sps 8 --pulse rrc -o qam.cf32
Two more that cannot run inside the docs gate — one generates without bound, the other needs a live broker — but are otherwise copy-paste:
# Endless bursts, each at a random Doppler offset and a jittered gap
wfmgen --type bpsk --fs 1e6 --sps 8 --pn-length 7 \
       --freq 11200:12800 --count 8192 --off 4000:5600 \
       --continuous --realtime -o stream.cf32

# Stream continuous QPSK to NATS for a live receiver, paced to real time
wfmgen --type qpsk --snr 10 --continuous --realtime --output nats://127.0.0.1:4222/iq
A scene from a JSON file — the spec format and a runnable example are in Scenes:
Installation
The wheel ships the self-contained wfmgen binary as package data and a
wfmgen console script — a thin os.execv shim over that same binary, so
argv, stdio and exit status all pass straight through. There is no second CLI
implementation in Python. To build from source instead:
git clone https://github.com/doppler-dsp/doppler && cd doppler
cmake -B build -DBUILD_PYTHON=ON && cmake --build build --target wfmgen_cli
# binary: build/native/src/wfmcompose/wfmgen
See also
- Gallery: wfmgen — one engine, every waveform — the spectra/constellations behind each type, with the demo script.
- Python: Source (NCO / LO / AWGN) — the building-block primitives the engine composes.